WHY YOUR MAKE-UP DOESN’T PHOTOGRAPH WELL - AND HOW TO FIX IT
- Chloe

- Dec 9, 2025
- 5 min read
Updated: Mar 15

As a professional make-up artist of over 13 years, these are the most common reasons I see make-up look completely different in photos.
We've all been there — you’ve spent ages on your make-up, used all the “good” products, followed tutorials from every influencer under the sun… and then you take a photo and suddenly:
You look shiny
Your under-eyes look dark
Your make-up looks patchy or flat
Or worst of all, it looks like you’re wearing no make-up at all
Trust me, I used to have these exact issues...
In fact, one of the reasons I fell in love with make-up all those years ago was because I couldn’t understand why my glam never photographed the way it looked in real life.
I’d spend hours watching Keeping Up With The Kardashians, wondering how Kim, Khloé and Kourtney always looked so flawless, no matter the lighting or occasion.
That curiosity led to years of trialling, testing, practising and perfecting camera-proof make-up on myself and later on clients.
Now I’m sharing everything I’ve learned so you never have to wonder why your make-up disappears in photos again!
Let’s break down exactly what’s going wrong and how to fix it, along with some product recommendations...
-
1. YOUR SKIN ISN’T PREPPED FOR PHOTOGRAPHY
There is a huge difference between skincare prep and make-up prep.
Being a glazed doughnut at night is cute, but too much slip under make-up leads to shine, movement and separation under flash.
How to Prep Properly
Use hydrating products, but let each layer fully absorb
Avoid greasy SPF or anything containing zinc/titanium dioxide if flash is involved
Choose a primer based on your skin type, not trends
Skin Prep Product Recommendations
Dry / Very Dry Skin:
Bubble Cosmic Silk Milky Toner
Weleda Skin Food
Milk Makeup Hydro Grip Primer
Normal / Combination Skin:
BYOMA Milky Toner
Glossier Priming Moisturiser
Rare Beauty Illuminating Primer
Combination / Oily Skin:
Laneige Blue Hyaluronic Water Bank Toner
Charlotte Tilbury Magic Water Cream
Milk Makeup Pore Eclipse Mattifying Primer

Bonus hack:
Sleep, hydrate, limit caffeine.
Lack of sleep = dehydrated skin + darker under-eyes.
2. YOU’RE NOT USING ENOUGH PRODUCT (OR LAYERING IT PROPERLY)
This is the #1 reason make-up looks invisible in flash photography. Cameras eat make-up, and flash washes out colour.
If you apply make-up the same way you do for errands, it will not show up. This is not "clean girl" make-up...get it on there, sis!
Fix
Apply thin layers and build gradually
Let each layer set before adding more
Press and pat to build up coverage, don’t swipe
Tools + Techniques
Dense buffing brush or make-up pad sponge for foundation
A dry beauty blender-style sponge for pressing concealer under the eyes
A pointed puff for baking and setting
Dense brushes for strong pigment (contour, blush)
Fluffy brushes for a diffused finish (bronzer, setting powder)
3. YOUR POWDER TECHNIQUE IS OFF
Powder is essential, even for dry skin. Without it, make-up moves, shines and disappears on camera.
Fix
Press powder into the skin, don’t swipe
Use different powders for different areas depending on your skin type
Avoid HD silica powders (flashback risk)
Full Powder Technique
Baking:
After concealer, pack loose setting powder under the eyes with a puff
Leave excess sitting briefly
Dust off immediately with a with some of your pressed powder (prevents it from looking too light or flashing back)
Powder Types:
Pressed powder = contains pigment, smooths/blurs, controls shine, sets your base
Loose powder = slightly tinted for extra coverage, used for under-eyes, carving cheekbones, snatching the nose
Loose Setting Powder Recommendations
Dry / Very Dry Skin:
Kosas Cloud Set Loose Powder
Normal / Combination or Combination / Oily Skin:
Huda Beauty Easy Bake Loose Setting Powder
Pressed Powder Recommendations
Dry / Very Dry Skin:
Kosas Cloud Set Pressed Powder
Normal / Combination Skin:
MAC Mineralize Skinfinish
Combination / Oily Skin:
Charlotte Tilbury Airbrush Flawless Pressed Powder

4. YOUR BRONZER, BLUSH & CONTOUR AREN’T BALANCED
Flash dulls pigment, meaning you need more colour, definition and warmth than you think.
Fix
Add 20-30% more than you normally would
Increase product payoff for flash
Use creams/liquids and layer with powders for longevity
Avoid overly cool-toned contours (they look muddy)
Use bronzer instead of contour for a more natural sculpt
Use two bronzers: a warm-toned one for warmth, and a deeper, more neutral one for definition
5. YOUR UNDER-EYES AREN’T BRIGHT ENOUGH FOR FLASH
The under-eye area takes the hardest hit under flash, so don't get caught out!
Fix
Choose the correct undertone (cool, neutral or warm depending on your skin tone)
Hydrate before concealer
Use a colour corrector for deep/dark circles
Use a full-coverage concealer in thin layers
Opt for a concealer thats 1-2 shades lighter than your foundation
Under-Eye Hydration Recommendations
Dry / Very Dry Skin:
Kiehl’s Creamy Eye Treatment with Avocado
Normal / Combination Skin:
The Inkey List Caffeine Eye Cream
Combination / Oily Skin:
BYOMA Depuffing Eye Gel
Concealer Recommendations
Dry / Very Dry Skin:
Kosas Revealer Concealer
Normal / Combination Skin:
Natasha Denona Hy-Glam Concealer
Combination / Oily Skin:
Hourglass Vanish Airbrush Concealer

6. YOUR MAKEUP ISN’T SET PROPERLY
Most people use the wrong spray for the wrong purpose. There are two types of sprays, and they are not interchangeable.
Setting Spray
Makes make-up melt together and removes powderiness.
Setting Spray Recommendations:
Tatcha Dewy Skin Mist — Dry / Very Dry Skin
Charlotte Tilbury Airbrush Flawless Setting Spray — Normal / Combination Skin
Revolution Matte Fix Oil Control Fixing Spray — Combination / Oily Skin
Fixing Spray
Locks make-up in place like hairspray for the face.
Fixing Spray Recommendation:
L’Oréal 3-Second Setting Mist (all skin types)
How to Set Properly
Apply setting spray after base + powder
Let it melt your make-up together
Add powder in key areas if needed
Finish with fixing spray
Use powder puffs and brushes appropriately

7. YOUR PRODUCT CHOICES AREN’T PHOTOGRAPHY-FRIENDLY
Dewy, sheer, balmy formulas disappear under flash.
Switch up your products accordingly for your "night-time" make-up routine.
Fix
Use medium–full coverage foundation
Satin or matte finishes photograph best
Avoid overly dewy primers and foundations
Never skip powder
Keep glow strategic, not all over
Highlight Placement
Bridge of the nose
Tip of the nose
Tops of cheekbones
Brow bone
Cupid’s bow
Highlighter Recommendations
Powder:
Rare Beauty Silky Touch Highlighter
Liquid:
Made By Mitchell Blursh Lights
Cream:
Victoria Beckham Beauty Reflect Highlighter Stick

8. YOUR LIGHTING IS SABOTAGING YOU
Lighting can make perfect make-up look bad, or elevate it completely.
Fix
Face the light source
Never put the light behind you
Avoid overhead spotlights
Avoid harsh side lighting
Mattify the centre of the face right before taking any photos with flash
Keep your background light-free, with the light source directly in front of you
9. YOUR BROWS & LIPS LACK DEFINITION
Cameras soften features, especially brows and lips.
Brows
Go one shade darker than usual
Layer a pencil/powder and a tinted gel
Add structure for balance
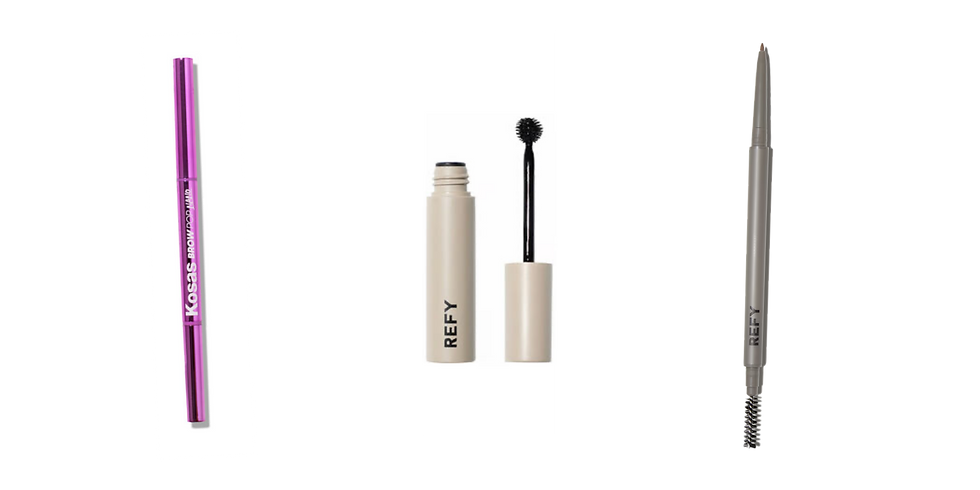
Brow Recommendations:
Kosas Brow Pop Nano
REFY Brow Pencil
REFY Brow Gel Tint
Lips
Use two liners — lighter/warm tone for natural shape, and a darker/cooler tone for contour
Add lipstick and gloss to give colour and dimension
Lip Liner Recommendations:
Rimmel Lasting Finish 8HR Lip Liner
Charlotte Tilbury Lip Cheat
Morphe Signature Lip Pencil
NYX Slim Lip Liner Pencil

TOUCH-UP ESSENTIALS
Carry with you at all times:
A tinted pressed powder compact
Your chosen lip combo
A disposable mascara wand (to keep lash extensions well-groomed)
A small concealer for around the mouth/chin if needed
Done correctly, you’ll barely need touch-ups, but these are lifesavers!
-
Once you master these techniques, your make-up will photograph beautifully in any lighting — flash, daylight, club lighting, whatever.
Try them, experiment, take before-and-afters, and watch how your glam transforms.
If you use any of these tips, tag me! I wanna see how good you did...


Comments